With the recent BBQ weather that we’ve been experiencing for the past few days, it’s probably time to prepare for the big spring clean!
While the main rooms of the house may enjoy the most attention when it comes to cleaning, it’s important not to leave out the garden shed. After all, chances are we’ll be spending most time outside come April. To help you get started, shed retailer Power Sheds have put together this piece with their top tips that will get your shed ready for the warm season.
Step 1: Remove all items from the shed
Sheds can turn into the most cluttered space simply because we often dump in them everything that doesn’t fit in the house. This is why you need to take all the items out and do a full inventory of the tools you own. There may be a lot of things you want to get rid of and make space for some new additions.
Step 2: Give everything a deep clean
Once all is out of the shed, give everything a deep clean, not just a little dusting. Sweep the floors, clean up spills and wash the shed windows. Deep-clean the items that haven’t been used in a long time and perhaps even give the inside of your shed a new layer of paint, for an extra touch of spring freshness.
Step 3: Decide what stays and what goes
This is the step where you need to be ruthless about the equipment and tools that will go back into the shed, the ones that will be taken to the local tip or that ones that will get donated. Consider what you will most likely use again this year and what generally sparks joy when seeing or using it. Whereas for the rest, it may be time to find them a new home.
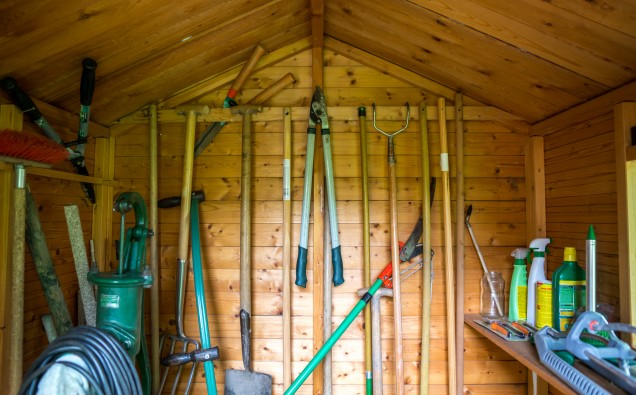
Step 4: Re-organise everything better
Use labels, jars, hooks, shelves and drawers to make the entire layout of the shed look and feel more organised. Make use of every wall in the shed to prepare for either a vertical or horizontal organisation. Maybe even both! When thinking of the re-organisation, there is one key element to consider – Create a simple and intuitive layout that makes it easy for anyone to find what they are looking for.
Step 5: Ensure the floor is clean
Before the shed spring clean is almost complete, make sure nothing lays around on the floor, but everything has a place. If you’ve got a few balls or bats, use a hamper to put them all in. Roll up your hose and place it in a storage pot or hang it on the wall. For bicycles that take up a lot of space, try to hang them from the ceiling, where possible, as this will make use of all the available space without cluttering the floor.
It may take a full weekend to go through each step, but you are sure to get a sense of achievement in the end. Once your shed is freshly clean and organised, you know that your garden is one step closer to being summer-ready.